Run Adguard Home with your own Decentralized Handshake DNS Resolver
First of all why run AdGuard Home with Handshake DNS Resolver?
Nice question. Think about it...
Suppose you are using
Cloudflare 1.1.1.1
or
Google 8.8.8.8
or
Quad9 9.9.9.9
as a resolver for your AdGuard Home and they are centralized company, if something happen like there whole server get's down for hours at that moment what can you do?
nothing really, only wait for those centralized company to get fixed via centralized employees!
Thats why we have chosen
Handshake
and
HNSD
is a lightweight client "Only 12MB", which act as a DNS Resolver. Which resolve domain from
Handshake
Full Node, But biggest benefit is it's Decentralized, Thousands of people running Full Nodes, So even one server down, There still so much server active that this network
can't be taken down, Thats why we have chosen
Handshake
HNSD
a lightweight client which resolve domains for us. Don't Worry,
Handshake
DNS Resolver (
HNSD
) can resolve ICANN's Domain too "Normal internet domain like
https://google.com/
"
First thing first, setup AdGuard Home.
How can you setup AdGuard Home? It's easy Follow this link
AdGuard Home setup done?
Now let's setup HNSD
This setup done with Debian based distro.
                            We have to build HNSD from source until they provide prebuilt package. When prebuilt package is available you can
                            Download from here
Now follow this guide to build HNSD from source
Done building HNSD? Now test it out if HNSD running or not
./hnsd -p 4 -r 0.0.0.0:5300If you ask "why we are using port 5300 instead of 53?" reason AdGuard Home will use port 53 so HNSD will use port 5300 or something else you like
HNSD working correctly right? Stop HNSD with "CTRL + C" for now
Next we need to start HNSD when system turn on. We will do that with systemd, follow these steps
sudo nano /etc/systemd/system/hnsd.service[Unit]
Description=hnsd
After=network.target
[Service]
Type=simple
Restart=always
RestartSec=1
User=root
ExecStart=/home/username/hnsd -p 4 -r 0.0.0.0:5300
[Install]
WantedBy=multi-user.target
Copy and paste these code in "
hnsd.service
" file then save with "CTRL + O" hit enter then "CTRL + X" to exit
Dont forget to change your Directory + Username in "ExecStart" line
It's time to enable HNSD
sudo systemctl daemon-reload
sudo systemctl start hnsd
sudo systemctl enable hnsd
Let's go back to our AdGuard Home
Now visit your AdGuard Home webpage, Go to Settings >> DNS settings
And add your localhost ip
127.0.0.1:5300
in Upstream DNS servers, Like this screenshot below
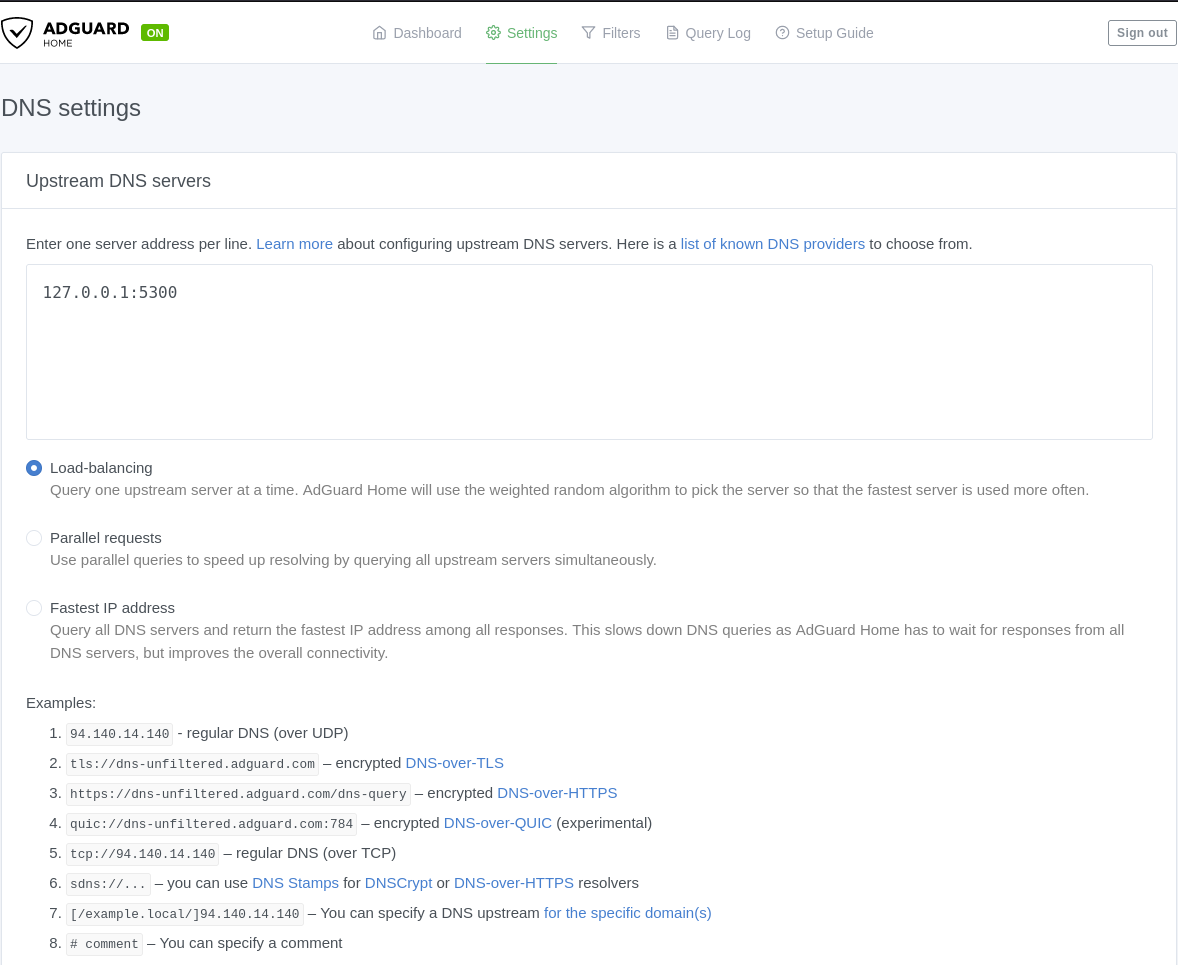
Scroll down click Apply then click Test Upstreams
You will see success notification
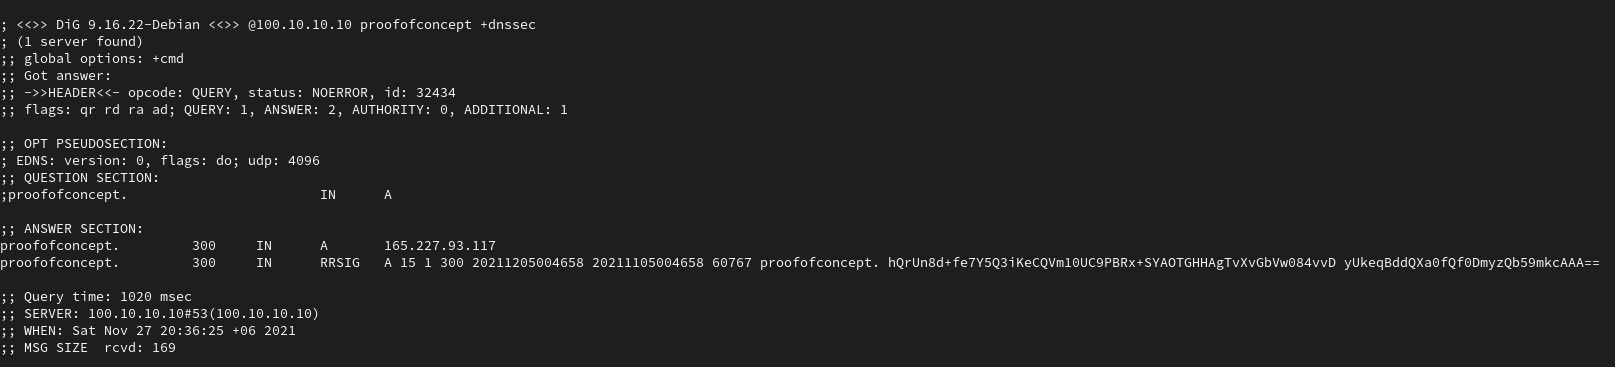
Done? Test it out with Adguard Home ip via terminal
dig @YourAdGuardHomeIP proofofconcept +dnssec

Example:
dig @100.10.10.10 proofofconcept +dnssec
You will see its showing ip address of
https://proofofconcept/
like this screenshot below